
Have you ever tasted ginkgo nuts? Ginkgo biloba tree has become famous all around the world for its health benefits, but it’s not widely known…
Have you ever tasted ginkgo nuts? Ginkgo biloba tree has become famous all around the world for its health benefits, but it’s not widely known…

Tonkatsu is the first dish I dream of whenever I go to Japan and, apart from having it several times during the stay, I always…

I’ve written several times about my adventures with okonomiyaki and I will probably never stop because I keep on inventing new versions and playing with…

Happy New Year! It’s been such a long time… I hope you are all doing well and haven’t completely forgotten about me! Have you also…

There are so many Japanese potato salad recipes on blogs and websites, often written by Japanese cooks, I hesitated a lot before posting it, but…

Do you ever cook anything in the microwave? I mean from the scratch? For many years I used it only to reheat and defrost, probably…
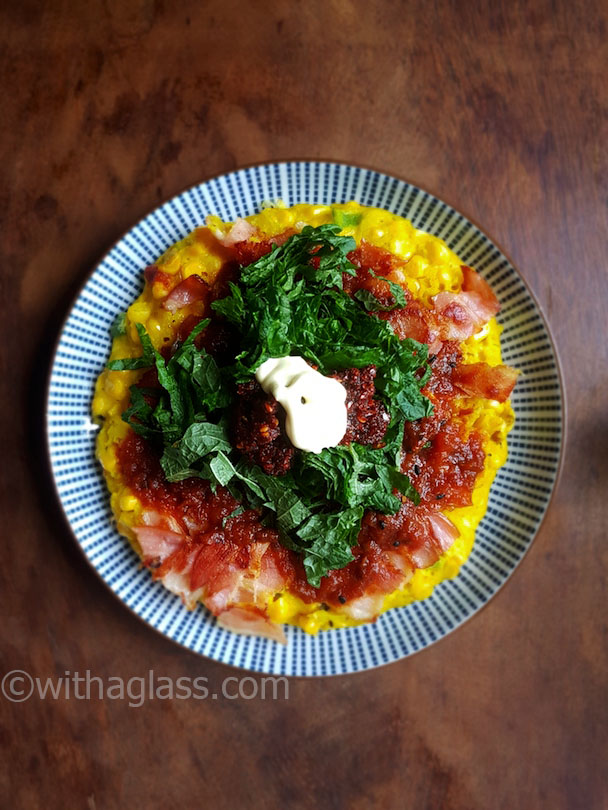
I’ve always been waiting for the asparagus or edible tomatoes, but this is the first year I’ve also been longing for fresh corn cobs. The…

Did you know not only the rhizome, but also wasabi stems and leaves are edible? I learnt it several years ago in an izakaya (a…

After several trips to Japan I learnt good gyoza aren’t easy to find in Tokyo. Maybe I was unlucky or maybe it’s Tokyo, but I…

This recipe might be very simple, but it solves a very serious question: “what else to do with a big tube of miso?”. Even if…