
I was taking my Saturday morning coffee in bed (alright, I will be honest: it was closer to midday, but it was my wake up…
I was taking my Saturday morning coffee in bed (alright, I will be honest: it was closer to midday, but it was my wake up…
This recipe is as simple as its name, but an unforgettable discovery for a feta addict like me. If you open my fridge any day,…

Just like every summer, I find it difficult to resist fresh, beautiful vegetables at my farmers’ market and usually end up with huge amounts. Last…
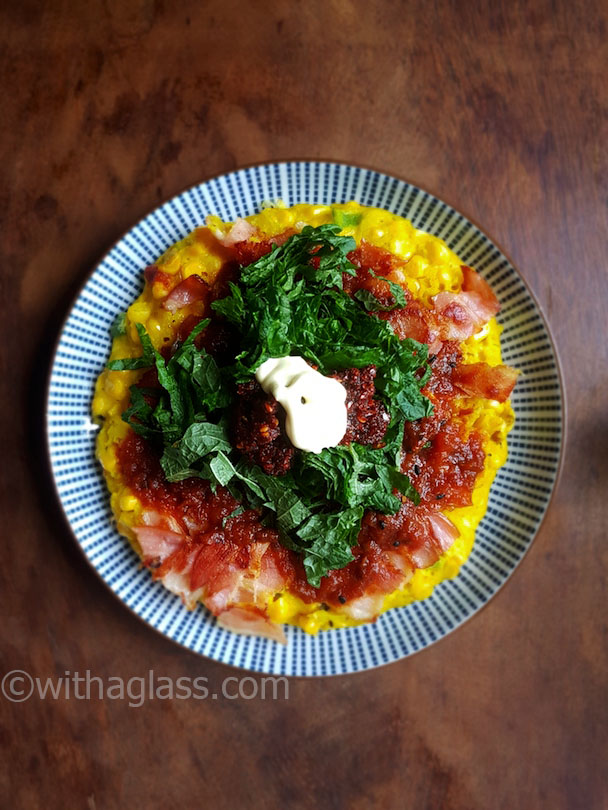
I’ve always been waiting for the asparagus or edible tomatoes, but this is the first year I’ve also been longing for fresh corn cobs. The…

It’s only the beginning of May, but I already face the over-abundant herb “problem” with some perennial plants. Chives, mint, parsley, thyme and tarragon have…

Are you an egg lover? Do you tend to add twice – or thrice – as much onions as written in recipes? If you have…

Does an omelette soaked in spicy tomato sauce speak to you? It certainly did to me! When I found it while looking for Indian egg…

If you think these pickles look and sound familiar, you are right: this is exactly the same recipe I posted seven months ago. I didn’t…

Fresh corn is the only vegetable I used to eat always in the same way: whole cobs, grilled or boiled, then salted and smothered with…

Okonomiyaki is one of the most frequent Japanese dishes in my house. From the beginning I took its name literally (it means roughly “grill what you want”)…